| 일 | 월 | 화 | 수 | 목 | 금 | 토 |
|---|---|---|---|---|---|---|
| 1 | 2 | 3 | 4 | 5 | 6 | 7 |
| 8 | 9 | 10 | 11 | 12 | 13 | 14 |
| 15 | 16 | 17 | 18 | 19 | 20 | 21 |
| 22 | 23 | 24 | 25 | 26 | 27 | 28 |
- 막내의막무가내 안드로이드 에러 해결
- 막무가내
- 막내의막무가내 rxjava
- 막내의막무가내 안드로이드 코틀린
- 막내의막무가내 안드로이드
- 막내의 막무가내 알고리즘
- 막내의막무가내 프로그래밍
- 부스트코스에이스
- 안드로이드 sunflower
- 막내의 막무가내
- 막내의막무가내 일상
- Fragment
- 안드로이드 Sunflower 스터디
- 주엽역 생활맥주
- 막내의막무가내 코틀린 안드로이드
- 프로그래머스 알고리즘
- 막내의막무가내 SQL
- 막내의막무가내 플러터
- flutter network call
- 프래그먼트
- 2022년 6월 일상
- 막내의막무가내 코볼 COBOL
- 부스트코스
- 막내의막무가내 플러터 flutter
- 안드로이드
- 막내의막무가내 알고리즘
- 막내의막무가내 회고 및 목표
- 막내의막무가내 코틀린
- 막내의막무가내 목표 및 회고
- 막내의막무가내
- Today
- Total
막내의 막무가내 프로그래밍 & 일상
[안드로이드] Notification(노티피케이션) 정리 및 예제 본문
[공식문서]
developer.android.com/training/notify-user/build-notification?hl=ko
알림 만들기 | Android 개발자 | Android Developers
알림은 사용 중이 아닌 앱의 이벤트에 관한 짧고 시기적절한 정보를 제공합니다. 이 페이지에서는 Android 4.0(API 레벨 14) 이상의 다양한 기능을 사용하여 알림을 만드는 방법을 설명합니다. Android
developer.android.com
[전체 소스코드]
github.com/mtjin/udemy-android-study/tree/main/notification-study/NotificationDemo
mtjin/udemy-android-study
Android Jetpack, Clean Architecture & Testing Masterclass (https://www.udemy.com/course/android-architecture-componentsmvvm-with-dagger-retrofit/) - mtjin/udemy-android-study
github.com
[유데미 강의]
www.udemy.com/course/android-architecture-componentsmvvm-with-dagger-retrofit/
Android Jetpack, Clean Architecture & Testing Masterclass
Android Jetpack, MVVM, Room, DataBinding, ViewModel, LiveData, Paging,Navigation, Dagger, Retrofit .. All In One Course!
www.udemy.com
요즘 위 유데미 강의를 통해 안드로이드 Jeptack, 아키텍처 등에 복습 및 공부하고 있습니다.
오늘은 유데미 강의와 안드로이드 공식문서로 안드로이드 노티피케이션의 기본 사용법에 대해 복습하였는데 이를 정리하는 포스팅을 하려고합니다.
코드 주석과 함께 핵심만 정리해보겠습니다. 전체코드는 마지막과 깃허브 주소를 참고해주세요 :)
자세한 설명은 안드로이드 공식문서에 대해 매우 잘 정리되어 있으므로 참고해주시면 감사하겠습니다.
[시작하기전 필요한 디펜던시]
dependencies {
        implementation "com.android.support:support-compat:28.0.0"
    }
1. 기본 노티피케이션

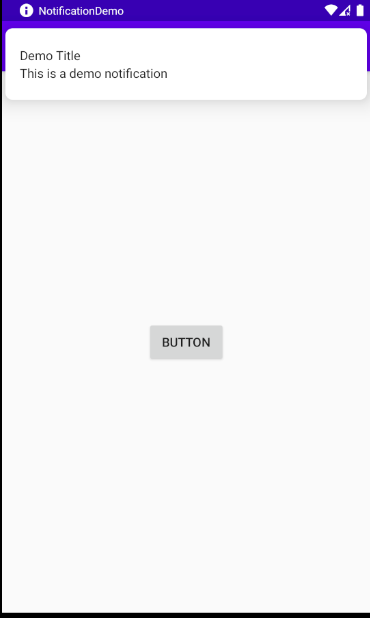
가장 기본적인 노티피케이션(알림)입니다.
기본적으로 노티피케이션은 다음과 같은 메인 로직으로 이루어져 있습니다.
1. 알림콘텐츠 설정 및 알람의 탭 작업 설정 (NotificationBuilder, PendingIntent 사용)
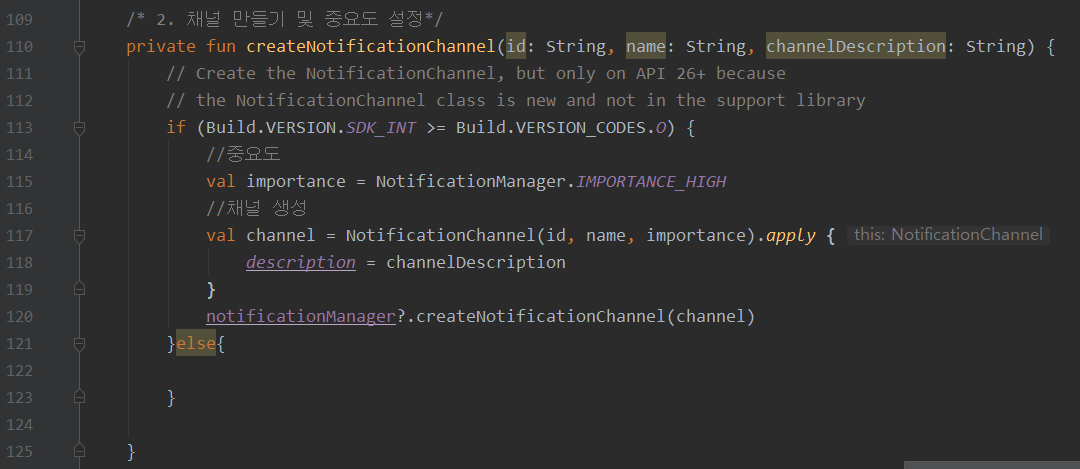
2. 채널 만들기 및 중요도 설정
3. 알림 표시
[알림 콘텐츠 설정 및 알람의 탭 작업 설정]


PendingIntent에 의해 노티피케이션 내용부분을 클릭 시 내가 설정한대로 SecondActivity 로 이동이 된다.

[채널 만들기 및 중요도 설정]


[알림 표시]


등록뿐 아니라 위에 참고에 써져있는 노티피케이션 업데이트, 삭제 관련 내용도 가져와봤습니다.

2. 작업 버튼 추가된 노티피케이션 (Set Action Button)

위와 같이 기본 노티피케이션 외에 위 그림과 같이 액션버튼을 설정할 수 있습니다. 그리고 일반 노티 알림 클릭과 같이 액션버튼을 눌렀을시 작동할 PendingIntent도 설정이 가능합니다.

참고: Android 10(API 수준 29) 이상에서는 앱에서 작업 버튼을 제공하지 않는 경우 플랫폼에서 자동으로 알림 작업 버튼을 생성합니다. 앱 알림에 추천 답장이나 작업을 표시하지 않으려면 setAllowGeneratedReplies() 및 setAllowSystemGeneratedContextualActions()를 사용하여 시스템에서 생성된 답장과 작업을 선택 해제하면 됩니다.


3. 바로 답장 작업 추가된 노티피케이션 (Direct Reply Action)


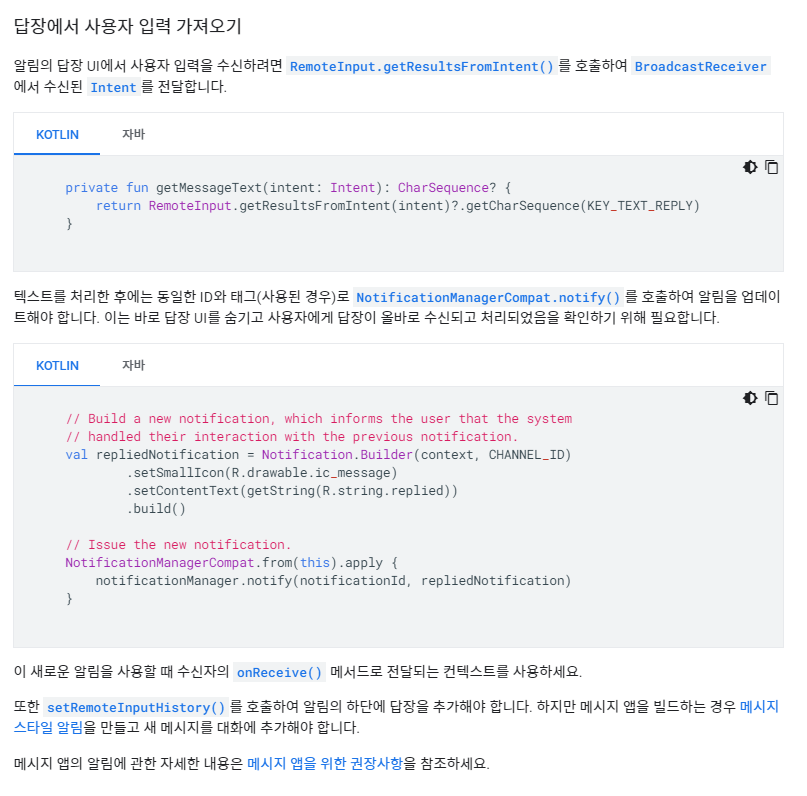
위와 같이 Reply 노티피케이션을 띄운 후 사용자가 Reply를 하게 되었을때 이동하게될 액티비티며 Reply한 내용을 받고 텍스트뷰에 세팅하고 받았다고 일반 노티피케이션을 띄워주는 예제입니다.


전체코드
[MainActivity]
package com.anushka.notificationdemo

import android.app.Notification
import android.app.NotificationChannel
import android.app.NotificationManager
import android.app.PendingIntent
import android.content.Context
import android.content.Intent
import android.os.Build
import android.os.Bundle
import androidx.appcompat.app.AppCompatActivity
import androidx.core.app.NotificationCompat
import androidx.core.app.RemoteInput
import kotlinx.android.synthetic.main.activity_main.*

class MainActivity : AppCompatActivity() {
    private val channelID = "com.anushka.notificationdemo.channel1"
    private var notificationManager: NotificationManager? = null
    private val KEY_REPLY = "key_reply"

    override fun onCreate(savedInstanceState: Bundle?) {
        super.onCreate(savedInstanceState)
        setContentView(R.layout.activity_main)
        //노티피케이션 매니저 서비스
        notificationManager = getSystemService(Context.NOTIFICATION_SERVICE) as NotificationManager
        //노티피케이션 채널 생성
        createNotificationChannel(channelID, "DemoChannel", "this is a demo")
        button.setOnClickListener {
            //
            displayNotification()
        }
    }

    private fun displayNotification() {
        /* 1. 알림콘텐츠 설정*/
        //채널 ID
        val notificationId = 45
        //알림의 탭 작업 설정 -----------------------------------------------------------------------
        val tapResultIntent = Intent(this, SecondActivity::class.java).apply {
            //현재 액티비티에서 새로운 액티비티를 실행한다면 현재 액티비티를 새로운 액티비티로 교체하는 플래그
            //flags = Intent.FLAG_ACTIVITY_BROUGHT_TO_FRONT
            //이전에 실행된 액티비티들을 모두 없엔 후 새로운 액티비티 실행 플래그
            flags = Intent.FLAG_ACTIVITY_CLEAR_TASK
        }
        val pendingIntent: PendingIntent = PendingIntent.getActivity(
            this,
            0,
            tapResultIntent,
            PendingIntent.FLAG_UPDATE_CURRENT
        )
        //알림의 탭 작업 설정(Reply 용)--------------------------------------------------------------
        val replyResultIntent = Intent(this, ReplyActivity::class.java)
        val replyPendingIntent: PendingIntent = PendingIntent.getActivity(
            this,
            0,
            replyResultIntent,
            PendingIntent.FLAG_UPDATE_CURRENT
        )
        //바로 답장 작업 추가(reply action)
        val remoteInput: RemoteInput = RemoteInput.Builder(KEY_REPLY).run {
            setLabel("Insert you name here") //텍스트 입력 힌트
            build()
        }

        val replyAction: NotificationCompat.Action = NotificationCompat.Action.Builder(
            0, //icon
            "REPLY", //title
            replyPendingIntent
        ).addRemoteInput(remoteInput)
            .build()
        //작업 버튼 추가(action button 1)-----------------------------------------------------------
        val intent2 = Intent(this, DetailsActivity::class.java)
        val pendingIntent2: PendingIntent = PendingIntent.getActivity(
            this,
            0, //request code
            intent2,
            PendingIntent.FLAG_UPDATE_CURRENT
        )
        val action2: NotificationCompat.Action =
            NotificationCompat.Action.Builder(0, "Details", pendingIntent2).build()
        // 작업 버튼 추가(action button 2)
        val intent3 = Intent(this, SettingActivity::class.java)
        val pendingIntent3: PendingIntent = PendingIntent.getActivity(
            this,
            0,
            intent3,
            PendingIntent.FLAG_UPDATE_CURRENT
        )
        val action3: NotificationCompat.Action =
            NotificationCompat.Action.Builder(0, "Settings", pendingIntent3).build()

        //노티피케이션 생성 -------------------------------------------------------------------------
        val notification: Notification = NotificationCompat.Builder(this@MainActivity, channelID)
            .setContentTitle("Demo Title") // 노티 제목
            .setContentText("This is a demo notification") // 노티 내용
            .setSmallIcon(android.R.drawable.ic_dialog_info) //아이콘이미지
            .setAutoCancel(true) // 사용자가 알림을 탭하면 자동으로 알림을 삭제합니다.
            .setPriority(NotificationCompat.PRIORITY_HIGH)
            .setContentIntent(pendingIntent) //노티클릭시 인텐트작업
            .addAction(action2) //액션버튼 인텐트
            .addAction(action3)
            .addAction(replyAction) //바로 답장 작업 추가(reply action) 액션버튼
            .build()
        /* 3. 알림 표시*///---------------------------------------------------------------------------
        //NotificationManagerCompat.notify()에 전달하는 알림 ID를 저장해야 합니다.
        // 알림을 업데이트하거나 삭제하려면 나중에 필요하기 때문입니다.
        notificationManager?.notify(notificationId, notification) //노티실행

    }

    /* 2. 채널 만들기 및 중요도 설정*/
    private fun createNotificationChannel(id: String, name: String, channelDescription: String) {
        // Create the NotificationChannel, but only on API 26+ because
        // the NotificationChannel class is new and not in the support library
        if (Build.VERSION.SDK_INT >= Build.VERSION_CODES.O) {
            //중요도
            val importance = NotificationManager.IMPORTANCE_HIGH
            //채널 생성
            val channel = NotificationChannel(id, name, importance).apply {
                description = channelDescription
            }
            notificationManager?.createNotificationChannel(channel)
        } else {

        }

    }

}
[ReplyActivity - reply action 받는 액티비티]
package com.anushka.notificationdemo

import android.app.NotificationManager
import android.app.RemoteInput
import android.content.Context
import android.os.Bundle
import androidx.appcompat.app.AppCompatActivity
import androidx.core.app.NotificationCompat
import kotlinx.android.synthetic.main.activity_reply.*

class ReplyActivity : AppCompatActivity() {
    override fun onCreate(savedInstanceState: Bundle?) {
        super.onCreate(savedInstanceState)
        setContentView(R.layout.activity_reply)
        receiveInput()
    }

    //Remote Input 노티피케이션 인텐트 수신
    private fun receiveInput() {
        val KEY_REPLY = "key_reply"
        val remoteInput = RemoteInput.getResultsFromIntent(intent)
        remoteInput?.let {
            val text = it.getCharSequence(KEY_REPLY).toString()
            tv_reply.text = text
            receiveSuccessNoti()
        }

    }

    private fun receiveSuccessNoti() {
        val channelID = "com.anushka.notificationdemo.channel1"
        val notificationId = 45

        val repliedNotification = NotificationCompat.Builder(this, channelID)
            .setSmallIcon(android.R.drawable.ic_dialog_info)
            .setContentText("Your reply received")
            .build()
        val notificationManager: NotificationManager =
            getSystemService(Context.NOTIFICATION_SERVICE) as NotificationManager
        notificationManager.notify(notificationId, repliedNotification)
    }
}
이상 안드로이드 노티피케이션의 기본 사용법에 대해 공부하고 복습하는 포스팅을 마치겠습니다.
이외에도 펼쳐지는(expandable) 노티피케이션이나 Bubble 등 다양한 노티피케이션과 설정, 처리 방법들이 있는데 추후 기회가 된다면 다뤄보도록 하겠습니다. ㅎㅎ 노티피케이션만 해도 공부할게 너무 많네요 허허
댓글과 공감은 큰 힘이 됩니다. 감사합니다. !!
'안드로이드 > 코틀린 & 아키텍처 & Recent' 카테고리의 다른 글
| [안드로이드] HostnameVerifier 인터페이스 구글 앱 업로드 거부 (해결 예정) (6) | 2021.03.12 |
|---|---|
| [안드로이드] 안드로이드 모바일 페이스북 광고 구현 총정리!! (20) | 2021.03.10 |
| [코틀린] 코루틴(coroutine) 학습 정리 (0) | 2021.02.13 |
| [안드로이드] 클린 아키텍처(Clean Architecture) 정리 및 구현 (43) | 2021.01.28 |
| [안드로이드] Android Jetpack Navigation Animation Transition (젯팩 네비게이션 애니메이션 트랜지션) (2) | 2021.01.23 |


