
| 일 | 월 | 화 | 수 | 목 | 금 | 토 |
|---|---|---|---|---|---|---|
| 1 | ||||||
| 2 | 3 | 4 | 5 | 6 | 7 | 8 |
| 9 | 10 | 11 | 12 | 13 | 14 | 15 |
| 16 | 17 | 18 | 19 | 20 | 21 | 22 |
| 23 | 24 | 25 | 26 | 27 | 28 | 29 |
| 30 |
- 막내의막무가내 플러터
- 안드로이드 Sunflower 스터디
- flutter network call
- 안드로이드 sunflower
- 막내의 막무가내 알고리즘
- 주엽역 생활맥주
- 프래그먼트
- 부스트코스에이스
- 부스트코스
- Fragment
- 2022년 6월 일상
- 막내의막무가내 일상
- 막내의막무가내 안드로이드 에러 해결
- 막내의막무가내 안드로이드 코틀린
- 막내의 막무가내
- 막내의막무가내 프로그래밍
- 막내의막무가내 코볼 COBOL
- 막내의막무가내 플러터 flutter
- 막내의막무가내 rxjava
- 막내의막무가내 코틀린
- 막내의막무가내 코틀린 안드로이드
- 막무가내
- 막내의막무가내 안드로이드
- 막내의막무가내 알고리즘
- 막내의막무가내 SQL
- 막내의막무가내 목표 및 회고
- 안드로이드
- 프로그래머스 알고리즘
- 막내의막무가내
- 막내의막무가내 회고 및 목표
- Today
- Total
막내의 막무가내 프로그래밍 & 일상
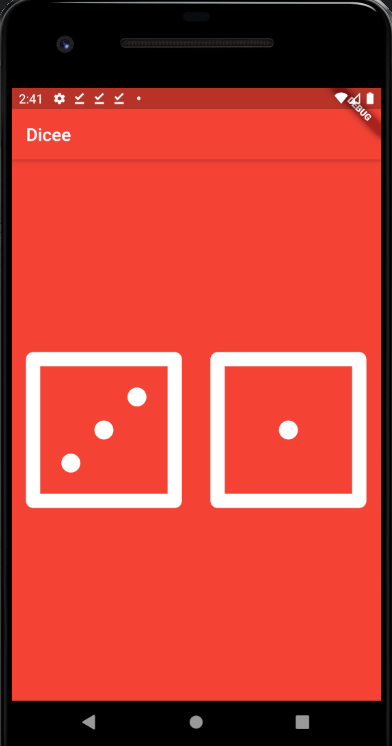
[Flutter] Udemy 플러터 강의 섹션 7 학습 (Dicee - Building Apps with State) 본문
[Flutter] Udemy 플러터 강의 섹션 7 학습 (Dicee - Building Apps with State)
막무가내막내 2021. 9. 13. 18:15

플러터에 대해 조금씩 학습하고 있습니다. 최근에는 연수때문에 시간이 부족하여 섹션 6 학습을 오늘 끝냈습니다.
앞으로도 안드로이드와 함께 조금씩 학습할 예정입니다.
다만 이 섹션부터는 강의 전반에 개념에 대한 정리는 생략하고 챌린지 및 코드위주로 기록하는 방식(?)으로 정리하려고 합니다.
왜냐하면 강의 전반에 대해 모두 정리하고 기록하려니까 시간도 많이 들고 비효율적이라고 생각했기 떄문입니다. 빠르게 학습하고 플러터로 개인 프로젝트를 하나 해보는게 더 좋을 것 같습니다.
또한 강의 질과 플러터 자료도 훌륭하고 매 강의마다 Challenge(챌린지)라고 과제 및 이해했는지 직접 코드를 짜보는 시간이 있어 굳이 모든 강의 내용을 정리안하고 챌린지 한 결과만 주석처리하여 기록하면 그것만 참고해도 나중에 좋을 것 같다고 느꼈습니다.
그래서 결론은 이제부터 강의 전반에 대한 정리가 아닌 챌린지 + 주석 위주로 간단 명료하게 정리할 예정입니다 :)
[이전학습]
https://youngest-programming.tistory.com/609
[Flutter] Udemy 플러터 강의 섹션 6 학습 (MiCard - How to Build Beautiful UIs with FlutterWidgets)
[이전학습] https://youngest-programming.tistory.com/607 [Flutter] Udemy 플러터 강의 섹션 5 학습 (I Am Poor - App Challenge) [이전학습] https://youngest-programming.tistory.com/606 [Flutter] Udemy..
youngest-programming.tistory.com
[참고]
https://www.udemy.com/course/flutter-bootcamp-with-dart/
The Complete 2021 Flutter Development Bootcamp with Dart
Officially created in collaboration with the Google Flutter team.
www.udemy.com
https://github.com/mtjin/flutter-practice
GitHub - mtjin/flutter-practice: Learning About Flutter (플러터 공부)
Learning About Flutter (플러터 공부). Contribute to mtjin/flutter-practice development by creating an account on GitHub.
github.com
[50. Dicee - A Stateful Dice App]
두 개의 주사위를 굴리는 앱을 만들 것 입니다.
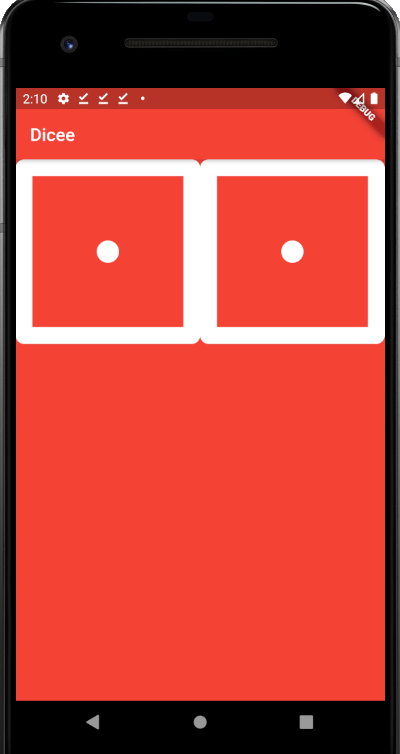
[51. Using the Expanded Widget to Create Flexible Layouts]
Expanded Widget에 대해 배웠습니다.
말 그대로 크기가 유연하게 확장될 수 있는 위젯으로 예를들어 화면 회전시 너비 비율이 달라짐을 대응하는데 유용합니다.
안드로이드로 치면 ConstraintLayout 에서 크기를 0dp로 설정하고 제약을 설정해서 제약에 따른 비율로 크기를 설정하는 것과 비슷하다고 느꼈습니다.
그리고 이 클래스는 flex라는 속성이 있는데 안드로이드로 치면 weight와 비슷하고 비율을 설정합니다.
https://api.flutter.dev/flutter/widgets/Expanded-class.html
Expanded class - widgets library - Dart API
A widget that expands a child of a Row, Column, or Flex so that the child fills the available space. Using an Expanded widget makes a child of a Row, Column, or Flex expand to fill the available space along the main axis (e.g., horizontally for a Row or ve
api.flutter.dev
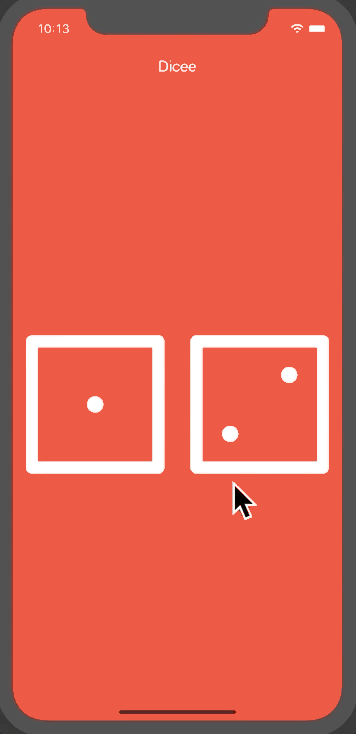
Image.asset() 을 활용하여 기존의 코드를 간결화 시킬 수 있음을 배웠습니다.
Expanded(
          flex: 1,
          child: Image.asset('images/dice1.png'),  // image.asset 을 사용해서 밑 코드 간결화
        ),
        Expanded(
            flex: 1,
            child: Image(
              image: AssetImage('images/dice1.png'),
            )),
최종코드
import 'package:flutter/material.dart';

void main() {
  return runApp(
    MaterialApp(
      home: Scaffold(
        backgroundColor: Colors.red,
        appBar: AppBar(
          title: Text('Dicee'),
          backgroundColor: Colors.red,
        ),
        body: DicePage(),
      ),
    ),
  );
}

class DicePage extends StatelessWidget {
  @override
  Widget build(BuildContext context) {
    return Row(
      children: <Widget>[
        Expanded(
          flex: 1,
          child: Image.asset('images/dice1.png'), // image.asset 로 코드 간결화
        ),
        Expanded(
          flex: 1,
          child: Image.asset('images/dice1.png'),
        )
      ],
    );
  }
}
[52. How to Use Intention Actions]
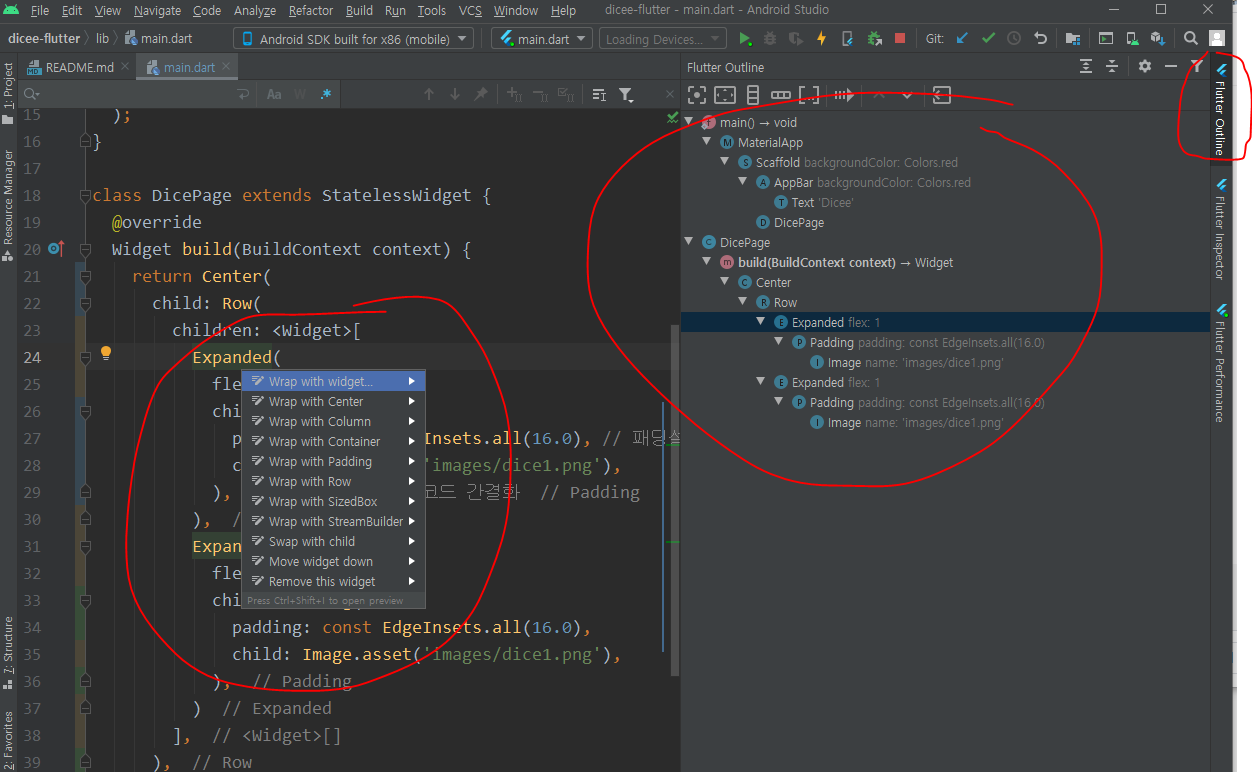
Intention Actions 에 대해 배웠습니다. 안드로이드 스튜디오에서 자주 사용했고 원래 알고 있던거입니다. 윈도우 기준 Alt+Enter로 더 간편하게 디자인 및 코딩을 할 수 있습니다. 또한 우측에 플러터 아웃라인을 통해서도 디자인의 정렬같은 것을 적용할 수 있다는 점도 배웠습니다.
import 'package:flutter/material.dart';
void main() {
return runApp(
MaterialApp(
home: Scaffold(
backgroundColor: Colors.red,
appBar: AppBar(
title: Text('Dicee'),
backgroundColor: Colors.red,
),
body: DicePage(),
),
),
);
}
class DicePage extends StatelessWidget {
@override
Widget build(BuildContext context) {
return Center(
child: Row(
children: <Widget>[
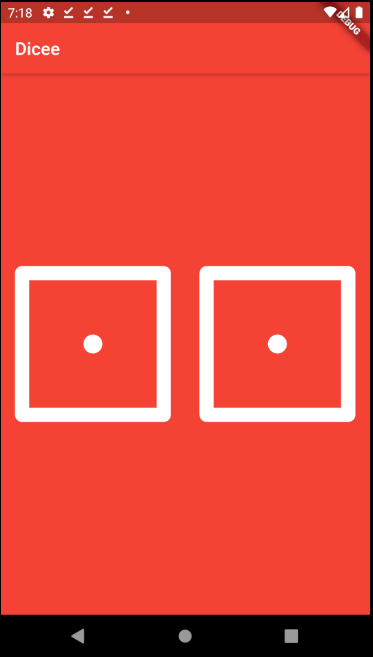
Expanded(
flex: 1,
child: Padding(
padding: const EdgeInsets.all(16.0), // 패딩설정
child: Image.asset('images/dice1.png'),
), // image.asset 로 코드 간결화
),
Expanded(
flex: 1,
child: Padding(
padding: const EdgeInsets.all(16.0),
child: Image.asset('images/dice1.png'),
),
)
],
),
);
}
}
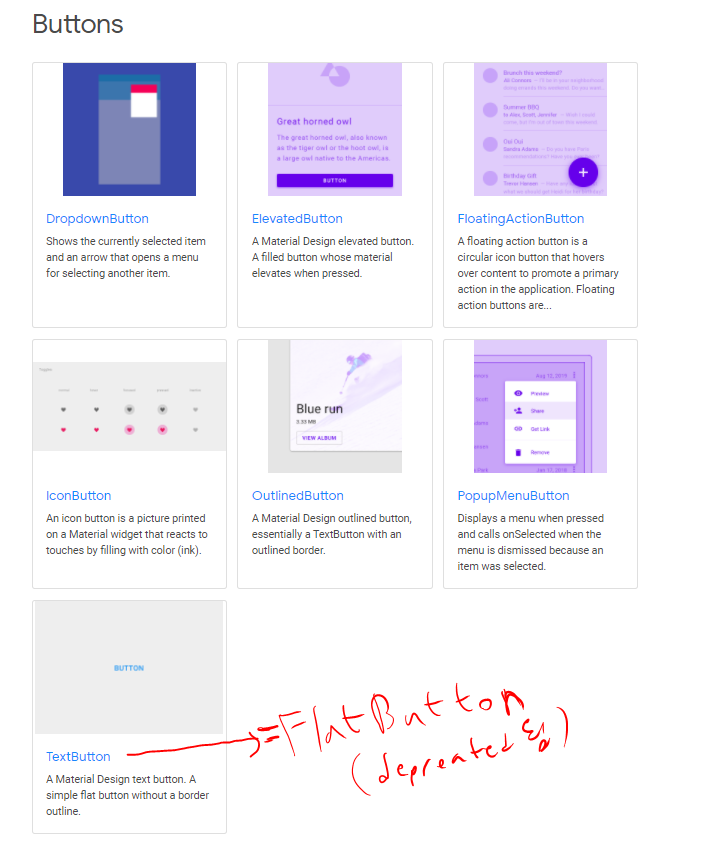
[53. Adding Gesture Detection with Flutter Button Widges]
https://flutter.dev/docs/development/ui/widgets/material
Material Components widgets
flutter.dev
Button 위젯에 대해 배웠습니다. 그 중 가장 기본 버튼이라 볼 수 있는 FlatButton을 사용해봤고 FlatButton의 경우 기본적으로 16패딩을 가지고 있습니다. 그리고 검색해본 결과 현재는 deprecated 되어서 TextButton으로 변경된 것 같습니다.
Button의 속성중에 onPressed 도 있는데 눌렀을때 반응하는 안드로이드의 클릭리스너라고 생각하면 될 것 같습니다.
import 'package:flutter/material.dart';

void main() {
  return runApp(
    MaterialApp(
      home: Scaffold(
        backgroundColor: Colors.red,
        appBar: AppBar(
          title: Text('Dicee'),
          backgroundColor: Colors.red,
        ),
        body: DicePage(),
      ),
    ),
  );
}

class DicePage extends StatelessWidget {
  @override
  Widget build(BuildContext context) {
    return Center(
      child: Row(
        children: <Widget>[
          Expanded(
            flex: 1,
            child: FlatButton(
              // FlatButton은 기본적으로 16 패딩을 갖음
              onPressed: () {
                print('왼쪽 주사위 onPressed!!!');
              }, // 클릭이벤트(void callback 구조)
              child: Image.asset('images/dice1.png'),
            ),
          ), // image.asset 로 코드 간결화
          Expanded(
            flex: 1,
            child: FlatButton(
                onPressed: () {
                  print('오른쪽 주사위 onPressed!!!');
                }, //
                child: Image.asset('images/dice1.png')),
          )
        ],
      ),
    );
  }
}
[54. [Dart] Functions - Part 1]
함수란 무엇인가와 익명 함수에 대해 배웠습니다.
전 강의인 위에서 onPressed 에서 사용하는 것도 익명 함수입니다.
[55. Making the Dice Image Change Reactively]
다트의 변수에 대해 처음 다뤄봤습니다. 다음 강의에서 변수에 대해 설명해주실 예정입니다.
var로 변수이름을 지을 수 있고 문자열에서 $로 변수를 삽입할 수 있습니다.
import 'package:flutter/material.dart';

void main() {
  return runApp(
    MaterialApp(
      home: Scaffold(
        backgroundColor: Colors.red,
        appBar: AppBar(
          title: Text('Dicee'),
          backgroundColor: Colors.red,
        ),
        body: DicePage(),
      ),
    ),
  );
}

class DicePage extends StatelessWidget {
  @override
  Widget build(BuildContext context) {

    var leftDiceNumber = 5; // 변수

    return Center(
      child: Row(
        children: <Widget>[
          Expanded(
            flex: 1,
            child: FlatButton(
              // FlatButton은 기본적으로 16 패딩을 갖음
              onPressed: () {
                print('왼쪽 주사위 onPressed!!!');
              }, // 클릭이벤트(void callback 구조)
              child: Image.asset('images/dice$leftDiceNumber.png'), // $로 문장에 변수삽입가능
            ),
          ), // image.asset 로 코드 간결화
          Expanded(
            flex: 1,
            child: FlatButton(
                onPressed: () {
                  print('오른쪽 주사위 onPressed!!!');
                }, //
                child: Image.asset('images/dice1.png')),
          )
        ],
      ),
    );
  }
}
[56. [Dart] Variables]
var로 변수를 짓는 방법과 값을 재할당하는 방법에 대해 배웠습니다.
기초적인 부분이기도 하고 자바스크립트나 코틀린 문법과 비슷하여 익숙한 것 같습니다.
[57. [Dart] Data Types]
Dart 언어의 데이터 타입에 대해 배웠습니다.
Dart는 컴파일시 자료형이 결정되는 정적타입언어이며 코틀린처럼 타입추론이 가능한 언어입니다.
그리고 다트에는 dynamic이라는 타입이 있는 것을 처음알았습니다.
가장 중요하게 배운것은 다트 공식문서에서 다트에서 var 나 dynamic의 사용은 예기치 못한 오류를 범할 수도 있으므로 타입을 String, int 처럼 명시해주는게 좋다고 합니다.
[58. Stateful vs. Stateless Widgets - What's the Difference?]
둘의 차이점은 단어 뜻 그대로라고 생각하면 되고 각각의 의미에 맞게 사용하면 됩니다.
Stateful 위젯은 상태를 변화시킬 수 있는 위젯입니다. 예를들어 사용자와의 상호작용을 통해 레이아웃(디자인) 등이 처음 상태와 변화될 수 있는 위젯입니다. 예를들어 이번 프로젝트인 주사위는 터치시마다 모양이 변경되어야 하므로 Stateful 이라고 볼 수 있습니다. stful 로 쉽게 만들 수 있습니다.
Stateless 위젯은 상태가 변화하지 않는 무변의 위젯입니다. 예를들어 이전 챕터 프로젝트 였던 변하지 않는 프로필 화면을 예시로 들 수 있겠습니다.
setState() 함수는 build() 를 재호출해주는 함수로 이것을 안하면 이 위젯의 레이아웃은 반영이 안됩니다. 즉 이 함수를 사용하여 위젯화면이 업데이트 되게 해주어야합니다.
import 'package:flutter/material.dart';

void main() {
  return runApp(
    MaterialApp(
      home: Scaffold(
        backgroundColor: Colors.red,
        appBar: AppBar(
          title: Text('Dicee'),
          backgroundColor: Colors.red,
        ),
        body: DicePage(),
      ),
    ),
  );
}

class DicePage extends StatefulWidget {
  const DicePage({Key key}) : super(key: key);

  @override
  _DicePageState createState() => _DicePageState();
}

class _DicePageState extends State<DicePage> {
  int leftDiceNumber = 5;

  @override
  Widget build(BuildContext context) {
    return Center(
      child: Row(
        children: <Widget>[
          Expanded(
            flex: 1,
            child: FlatButton(
              // FlatButton은 기본적으로 16 패딩을 갖음
              onPressed: () {
                setState(() {
                  leftDiceNumber = 3;
                }); // setState() 메소드를 build() 함수를 다시 호출하게 해줌
              }, // 클릭이벤트(void callback 구조)
              child: Image.asset('images/dice$leftDiceNumber.png'),
            ),
          ), // image.asset 로 코드 간결화
          Expanded(
            flex: 1,
            child: FlatButton(
                onPressed: () {
                  print('오른쪽 주사위 onPressed!!!');
                }, //
                child: Image.asset('images/dice1.png')),
          )
        ],
      ),
    );
  }
}
[59. Randomising the Dice]
플러터 머터리얼 기본라이브러리 외에 Math 라이브러리를 import하여 주사위 숫자를 랜덤으로 나오게 구현하였습니다.
https://api.dart.dev/stable/2.13.4/dart-math/dart-math-library.html
dart:math library - Dart API
Mathematical constants and functions, plus a random number generator. To use this library in your code: import 'dart:math'; Classes MutableRectangle A class for representing two-dimensional axis-aligned rectangles with mutable properties. Point A utility c
api.dart.dev
import 'dart:math'; // Math 라이브러리 추가
import 'package:flutter/material.dart';

void main() {
  return runApp(
    MaterialApp(
      home: Scaffold(
        backgroundColor: Colors.red,
        appBar: AppBar(
          title: Text('Dicee'),
          backgroundColor: Colors.red,
        ),
        body: DicePage(),
      ),
    ),
  );
}

class DicePage extends StatefulWidget {
  const DicePage({Key key}) : super(key: key);

  @override
  _DicePageState createState() => _DicePageState();
}

class _DicePageState extends State<DicePage> {
  int leftDiceNumber = 5;

  @override
  Widget build(BuildContext context) {
    return Center(
      child: Row(
        children: <Widget>[
          Expanded(
            flex: 1,
            child: FlatButton(
              // FlatButton은 기본적으로 16 패딩을 갖음
              onPressed: () {
                setState(() {
                  leftDiceNumber = Random().nextInt(6) + 1; // 숫자 랜덤
                }); // setState() 메소드를 build() 함수를 다시 호출하게 해줌
              }, // 클릭이벤트(void callback 구조)
              child: Image.asset('images/dice$leftDiceNumber.png'),
            ),
          ), // image.asset 로 코드 간결화
          Expanded(
            flex: 1,
            child: FlatButton(
                onPressed: () {
                  print('오른쪽 주사위 onPressed!!!');
                }, //
                child: Image.asset('images/dice1.png')),
          )
        ],
      ),
    );
  }
}
[60. Challenge 1 Solution]
현재 주사위가 하나만 구현되어있는데 나머지 주사위도 동일한 기능을 갖게 구현하는 첫번째 챌린지를 진행했습니다.
import 'dart:math'; // Math 라이브러리 추가
import 'package:flutter/material.dart';

void main() {
  return runApp(
    MaterialApp(
      home: Scaffold(
        backgroundColor: Colors.red,
        appBar: AppBar(
          title: Text('Dicee'),
          backgroundColor: Colors.red,
        ),
        body: DicePage(),
      ),
    ),
  );
}

class DicePage extends StatefulWidget {
  const DicePage({Key key}) : super(key: key);

  @override
  _DicePageState createState() => _DicePageState();
}

class _DicePageState extends State<DicePage> {
  int leftDiceNumber = 5;
  int rightDiceNumber = 5;

  @override
  Widget build(BuildContext context) {
    return Center(
      child: Row(
        children: <Widget>[
          Expanded(
            flex: 1,
            child: FlatButton(
              // FlatButton은 기본적으로 16 패딩을 갖음
              onPressed: () {
                setState(() {
                  leftDiceNumber = Random().nextInt(6) + 1; // 숫자 랜덤
                }); // setState() 메소드를 build() 함수를 다시 호출하게 해줌
              }, // 클릭이벤트(void callback 구조)
              child: Image.asset('images/dice$leftDiceNumber.png'),
            ),
          ), // image.asset 로 코드 간결화
          Expanded(
            flex: 1,
            child: FlatButton(
                onPressed: () {
                  setState(() {
                    rightDiceNumber = Random().nextInt(6) + 1; // 숫자 랜덤
                  });
                }, //
                child: Image.asset('images/dice$rightDiceNumber.png')),
          )
        ],
      ),
    );
  }
}
[61. Challenge 2 Solution]
이전에는 각각 클릭한 주사위의 숫자가 랜덤으로 나오게했다면 이번 챌린지는 클릭 시 두개의 주사위가 모두 숫자가 바뀌게 해야하는 챌린지를 했습니다.
import 'dart:math'; // Math 라이브러리 추가

import 'package:flutter/material.dart';

void main() {
  return runApp(
    MaterialApp(
      home: Scaffold(
        backgroundColor: Colors.red,
        appBar: AppBar(
          title: Text('Dicee'),
          backgroundColor: Colors.red,
        ),
        body: DicePage(),
      ),
    ),
  );
}

class DicePage extends StatefulWidget {
  const DicePage({Key key}) : super(key: key);

  @override
  _DicePageState createState() => _DicePageState();
}

class _DicePageState extends State<DicePage> {
  int leftDiceNumber = 5;
  int rightDiceNumber = 5;

  @override
  Widget build(BuildContext context) {
    return Center(
      child: Row(
        children: <Widget>[
          Expanded(
            flex: 1,
            child: FlatButton(
              // FlatButton은 기본적으로 16 패딩을 갖음
              onPressed: () {
                setState(() {
                  leftDiceNumber = Random().nextInt(6) + 1; // 숫자 랜덤
                  rightDiceNumber = Random().nextInt(6) + 1; // 숫자 랜덤
                }); // setState() 메소드를 build() 함수를 다시 호출하게 해줌
              }, // 클릭이벤트(void callback 구조)
              child: Image.asset('images/dice$leftDiceNumber.png'),
            ),
          ), // image.asset 로 코드 간결화
          Expanded(
            flex: 1,
            child: FlatButton(
                onPressed: () {
                  setState(() {
                    leftDiceNumber = Random().nextInt(6) + 1; // 숫자 랜덤
                    rightDiceNumber = Random().nextInt(6) + 1; // 숫자 랜덤
                  });
                }, //
                child: Image.asset('images/dice$rightDiceNumber.png')),
          )
        ],
      ),
    );
  }
}
[62. Challenge 3 Solution]
마지막 챌린지는 61에서 주사위 숫자를 랜덤하는 코드를 함수로 묶는거였습니다.
import 'dart:math'; // Math 라이브러리 추가

import 'package:flutter/material.dart';

void main() {
  return runApp(
    MaterialApp(
      home: Scaffold(
        backgroundColor: Colors.red,
        appBar: AppBar(
          title: Text('Dicee'),
          backgroundColor: Colors.red,
        ),
        body: DicePage(),
      ),
    ),
  );
}

class DicePage extends StatefulWidget {
  const DicePage({Key key}) : super(key: key);

  @override
  _DicePageState createState() => _DicePageState();
}

class _DicePageState extends State<DicePage> {
  int leftDiceNumber = 5;
  int rightDiceNumber = 5;

  void randomDice(){ // 주사위 랜덤 함수 모듈화
    setState(() {
      leftDiceNumber = Random().nextInt(6) + 1; // 숫자 랜덤
      rightDiceNumber = Random().nextInt(6) + 1; // 숫자 랜덤
    }); // setState() 메소드를 build() 함수를 다시 호출하게 해줌
  }

  @override
  Widget build(BuildContext context) {
    return Center(
      child: Row(
        children: <Widget>[
          Expanded(
            flex: 1,
            child: FlatButton(
              // FlatButton은 기본적으로 16 패딩을 갖음
              onPressed: () {
                randomDice();
              }, // 클릭이벤트(void callback 구조)
              child: Image.asset('images/dice$leftDiceNumber.png'),
            ),
          ), // image.asset 로 코드 간결화
          Expanded(
            flex: 1,
            child: FlatButton(
                onPressed: () {
                  randomDice();
                }, //
                child: Image.asset('images/dice$rightDiceNumber.png')),
          )
        ],
      ),
    );
  }
}
이상 플러터 섹션 7 학습을 마쳤습니다.
State, Dart 문법, 유저와의 인터렉션 등의 기본적인 내용을 배웠습니다.

댓글과 공감은 큰 힘이 됩니다. 감사합니다. !!!
[다음 포스팅]
https://youngest-programming.tistory.com/621
[Flutter] Udemy 플러터 강의 섹션 8 학습 (학습중..) (Boss Level Challenge 1 - Magic 8 Ball)
[이전학습] https://youngest-programming.tistory.com/617 [Flutter] Udemy 플러터 강의 섹션 7 학습 (Dicee - Building Apps with State) 플러터에 대해 조금씩 학습하고 있습니다. 최근에는 연수때문에 시간이..
youngest-programming.tistory.com
'플러터(Flutter) & Dart' 카테고리의 다른 글
| [Flutter] Udemy 플러터 강의 섹션 9 학습 (Xylophone - Using Flutter and Dart Packages toSpeed Up Development) (0) | 2021.09.23 |
|---|---|
| [Flutter] Udemy 플러터 강의 섹션 8 학습 (Boss Level Challenge 1 - Magic 8 Ball) (0) | 2021.09.21 |
| [Flutter] 플러터 폰트 적용 안 되는 에러 (4) | 2021.09.10 |
| [플러터] Flutter 참고하면 좋은 사이트 모음 (0) | 2021.08.24 |
| [Flutter] Udemy 플러터 강의 섹션 6 학습 (MiCard - How to Build Beautiful UIs with FlutterWidgets) (0) | 2021.08.19 |


